Monday, September 28, 2020

TRHD October Release Day 1: A RHINO!!

 
 We are celebrating the October Release at The Rabbit Hole Designs!

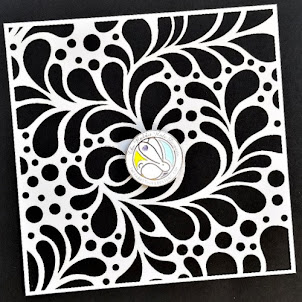
Today we are sharing projects with the new stencil "Splish Splash" and the new stamp set "Caffeinated Rhino",   part of the Caffeinated Critter series.  I have used both to make this card.  

 
  1. I inked the area with gray ink using a Cotton Tail Blending brush 
  2. I put the Splish Splash stencil on the gray area and applied Blueprint Sketch Distress Oxide ink with a Cotton Tail Blending brush.
  3. I removed the tape and allowed the panel to dry.
  4. I stamped the rhino on Ranger Cracked Leather cardstock with black Versafine ink and embossed it with clear embossing powder.
  5. I colored the rhino with copics and cut him out.
  6. I stamped, colored and cut out the tiny bird.
  7. I stamped the sentiment from the rhino set using blue ink on gray paper.
  8. I assembled the card using foam tape. 


 Loving the look of the distressed cracked leather cardstock!


 Join us on the hop celebrating these two new 
additions to the Rabbit Hole Family of products:


Thank you for stopping by,

Kelly


Affiliate links used in this post at no cost to you. 


For more inspiration, updates, and news make sure to check out these places.


Wednesday, September 16, 2020

TRHD Mini Release- Bags and Tags


 Happy September!  

The Rabbit Hole Designs, LLC is having a 

Mini Release of more Halloween goodies this week.

There's the new "Pumpkin Face" Stencil as well as the adorable "Boo Kitty" stamp!

I am featuring Boo Kitty with Rabbit Hole Designs stencils in these gift bags.

Does your neighborhood to the "You've Been Boo-ed"? in October?

Mine usually does. These bags are a cute way to send a neighbor some goodies. 


BAG and TAG 1:

The first bag was inked with Distress Oxide inks on the stencil "Candy Twist". I also used the stencil on the pre-made tag.  I stamped, colored and cut out the Boo Kitty and adhered him to the tag.  I used the "to" and from " from "Pawlidays" to complete the tag. 


BAG and TAG 2:
 
The bag and tag were inked with Distress Oxide inks. While that dried, I stamped, colored and cut out the Boo Kitty.  I then used the "Ribbon Star" stencil with black ink down one side of the tag.  I stamped "boo" from the "Boo Kitty" set. Then, I adhered the kitty to the tag. 


 Thank you so much for stopping by.
I hope you are inspired to get crafty today.
-Kelly

affiliate links used in post at no cost to you.


Monday, September 14, 2020

TRHD Mini Release- Halloween Banner

 Happy September!  

The Rabbit Hole Designs, LLC is having a 

Mini Release of more Halloween goodies this week.

There's the new "Pumpkin Face" Stencil as well as the adorable "Boo Kitty" stamp!I have used both to create this Halloween Banner! 


To make the banner, I cut all my banner pieces.  I stenciled the pumpkin faces on the white banners.  I used Distress Ink and Distress Oxide inks with the Cotton Tail Blending brushes. I stamped, colored and cut out the Boo Kitty image.  I decided to try a calico kitty and I was very happy with the result.  I put him as the focal point in the center of the banner. I punched the holes in the corners of the banner and then strung it with orange twine.

Fun stencils to add to your fall/Halloween decor!


Thank you for stopping by!

Check out the website for more inspiration using this cute Halloween Mini Release

-Kelly

affiliate links are used on this blog at no cost to you 


Saturday, September 12, 2020

It's Who You Travel With


 Hello Crafty Peeps! Kelly here and I am sharing a card I made using the new  "Turtle Botanical" stamp set along with their stencil "Diamond Flower" by 

The Rabbit Hole Designs, LLC. 

I made this card by first stamping and coloring the turtle image with            Copics (R85, E04, RV000, G40, G43, G28)

I fussy cut him out and then stamped the sentiment from the set and made a frame.

I used the Cotton Tail Blending brushes on the stencil with ink ink. 

I wrapped the top stenciled panel with the green twine to give the turtle some balance so it wouldn't look like he's floating so much.   I attached him to the card with foam tape.  I added some clear Nuvo drops for added interest.


Thank you for stopping by,

Kelly


Affiliate links used in this post at no cost to you. 


For more inspiration, updates, and news make sure to check out these places.


Tuesday, August 25, 2020

TRHD Sept Release Day 2

 Welcome to Day2 of the Rabbit Hole Designs September Release!

Today I am featuring their new beautiful stamp set "Turtle Botanical" with their stencil "Twisted Sunshine"

I used the two together to decorate a gift bag and create a matching tag.

  • I placed the stencil on the bag and secured it with purple tape.
  • I used a Cotton Tail Blending Brush to apply the yellow ink to the bag.  I also used the stencil on a store-bought tag.  
  • I used the "to" and "from" from "Pawlidays" on the tag.
  • I stamped, colored (Copics YG95, YG17, G43, G40, Y11, Y15) and cut out the botanical turtle as well as the extra flower in the set. 
  • I attached the turtle to the bag with two layers of foam tape and the flower with one layer.
  • I stamped the sentiment in green and glued it to the bag.
  • I added green gems to the stencil pattern.


 Hop along with the Design Team to see other ideas for Turtle Botanical 

as well as other products by The Rabbit Hole Designs:


The Rabbit Hole Designs
Amanda
Von Marie
Lauren
Tangii
Michelle
Kelly ** you are here**
Jammie


GIVEAWAYS:
To celebrate the next three days of release, The Rabbit Hole Designs is giving away two savings vouchers; one to a lucky Instagram Follower and one to a lucky Fan Page follower. Winner will be chosen at random from the comments left on the INSTAGRAM post, and tagging friends, and also from commenting on the Fan Page post. So make sure to head on over to INSTAGRAM and look for the giveaway post @therabbitholedesignsllc and look for the post at The Rabbit Hole Designs Fan Page by 11:59 p.m. PST 08-27-2020. Winner will be announced on The Rabbit Hole Designs blog 08-28-2020.


Thank for stopping by,

Kelly

(affiliate links are used on this blog at not cost to you) 

Sunday, August 23, 2020

Love You More- Shaker Card!

 HI There!  

I am sharing a card today I made with one of my favorite sets by The Rabbit Hole Designs "Love You More" .  I used this set last year for an anniversary card, again for Christmas 2019 and then once again for my 18th anniversary in 2020.  I've included all the cards here to see the versatility of the set. 

For this recent card, I used the set and made a shaker card!  The shaker bits are by The Doodles Playground Etsy store.  I had gotten them free with an order.  Since my husband and I got married in Vegas, they were PERFECT for an anniversary shaker card! 

I started this card by stamping coloring and fussy cutting the adorable couple.

I die cut the heart for my top panel and added a few red hearts from the stamp set. I stamped the sentiment in red ink on the gray patterned paper and  I built the shaker with foam adhesive.  I adhered the couple on the front of the card.

Those Bunny Bowls for embellishments are now available!

Scroll down to see two other ways I used this stamp set. 


Christmas Card 2019


Anniversary Card 2019


Thank you for stopping by to see my cards featuring "Love You More" by          The Rabbit Hole Designs

Have a GREAT day!,

Kelly


Affiliate links are used at no cost to you.

Tuesday, July 28, 2020

Rabbit Hole Designs Aug Release Day 2

Welcome to day 2 of the newest release by The Rabbit Hole Designs.
We are getting started on Halloween projects with this wicked good release.

Today, I am featuring their new set "Country Witch".
She is full of sass, wearing boots and hanging out on her broomstick.
There is also a die available for her! 
YEEHAW!

I went to town making THREE treat containers.
You'll see some images from one of yesterday's sets, "Bicycle Witch" too.
Find all the new products HERE.
Scroll down for hop info and giveaway info.

Directions for sour cream containers:
  • First I cut my paper to 6" by 6"
  • I decorated by panels with stamps or a stencil. 
  • I lines three sides with strong double-sided tape.
  • I removed one side of tape and made a "log" like a toilet paper roll.
  • I removed another tape pinched the one end together.
  • I filled the container with candy.
  • I then removed the last piece of tape and pinched that end opposite of the other.
  • I used a paper crimper on the ends. 
  • Google sour cream containers.  I like THIS one. Her paper is smaller than mine. 


COUNTRY WITCH TAG:
Country Witch (dies are available) for the tag
Used Diamond Flower Stencil on the container with 
green yellow, purple and orange inks and Cotton Tail Blending Brushes
LOOK AT THAT BLEND!!  


CAT TAG:
Country Witch kitty on the tag
"to" and "from" is from "Pawlidays"  
Various images from the sets on background


BICYCLE WITCH TAG

For the orange one, I used Bicycle Witch and various images on the container
She has a glittery outfit and a glittery pumpkin on her bike 
(dies are now available!)


We hope you will fly along for more inspiration using these new sets 
from The Rabbit Hole Designs:


To celebrate the next three days of release, The Rabbit Hole Designs is giving away two saving vouchers; one to a lucky Instagram Follower and one to a lucky Fan Page follower. Winner will be chosen at random from the comments left on the INSTAGRAM post, and tagging friends, and also from commenting on the Fan Page post. So make sure to head on over to INSTAGRAM and look for the giveaway post @therabbitholedesignsllc and look for the post at The Rabbit Hole Designs Fan Page by 11:59 p.m. PST 07-30-2020. Winner will be announced on The Rabbit Hole Designs blog 07-31-2020.


For more information, news and updates check out these links:


Thank you for stopping by!

 -Kelly
@kelbertram on Instagram